


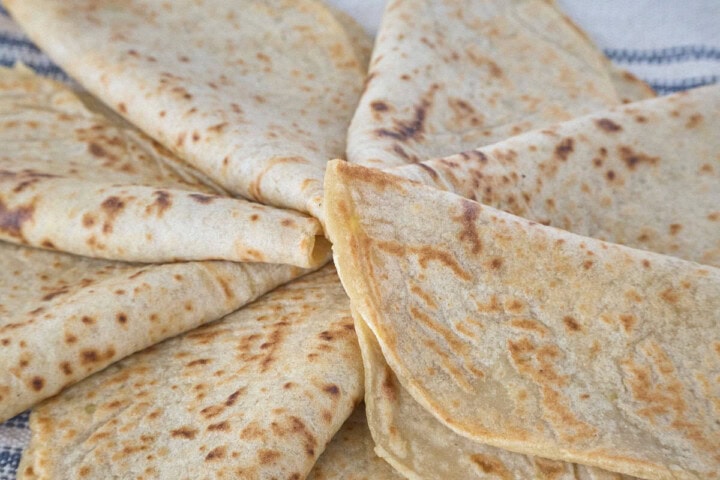


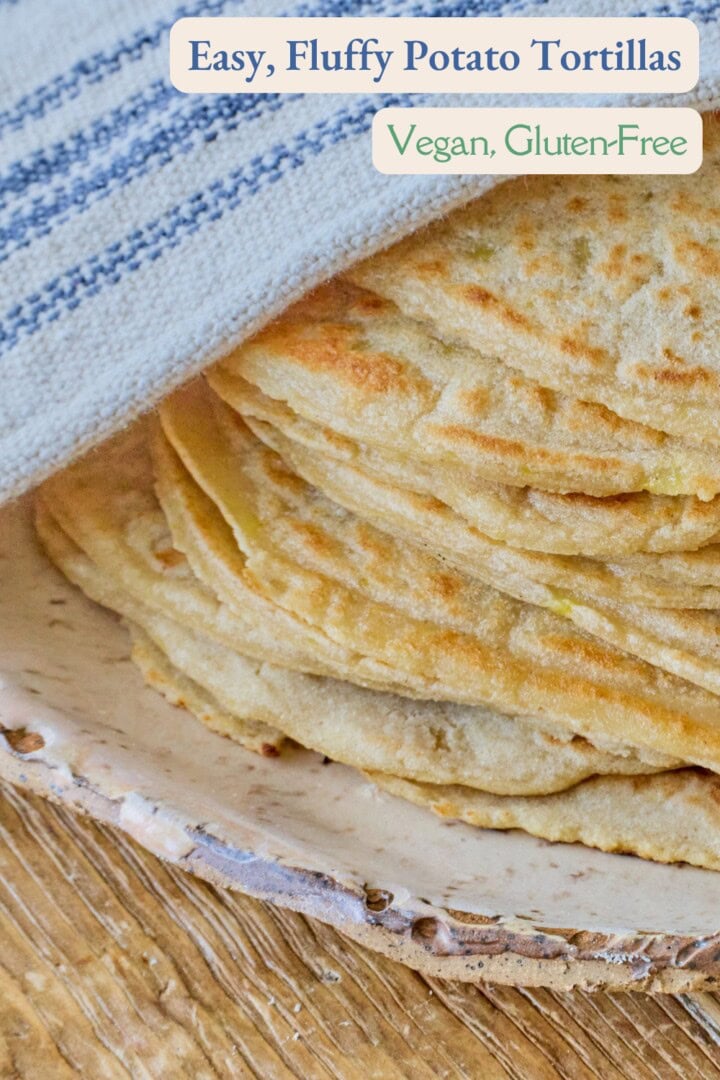
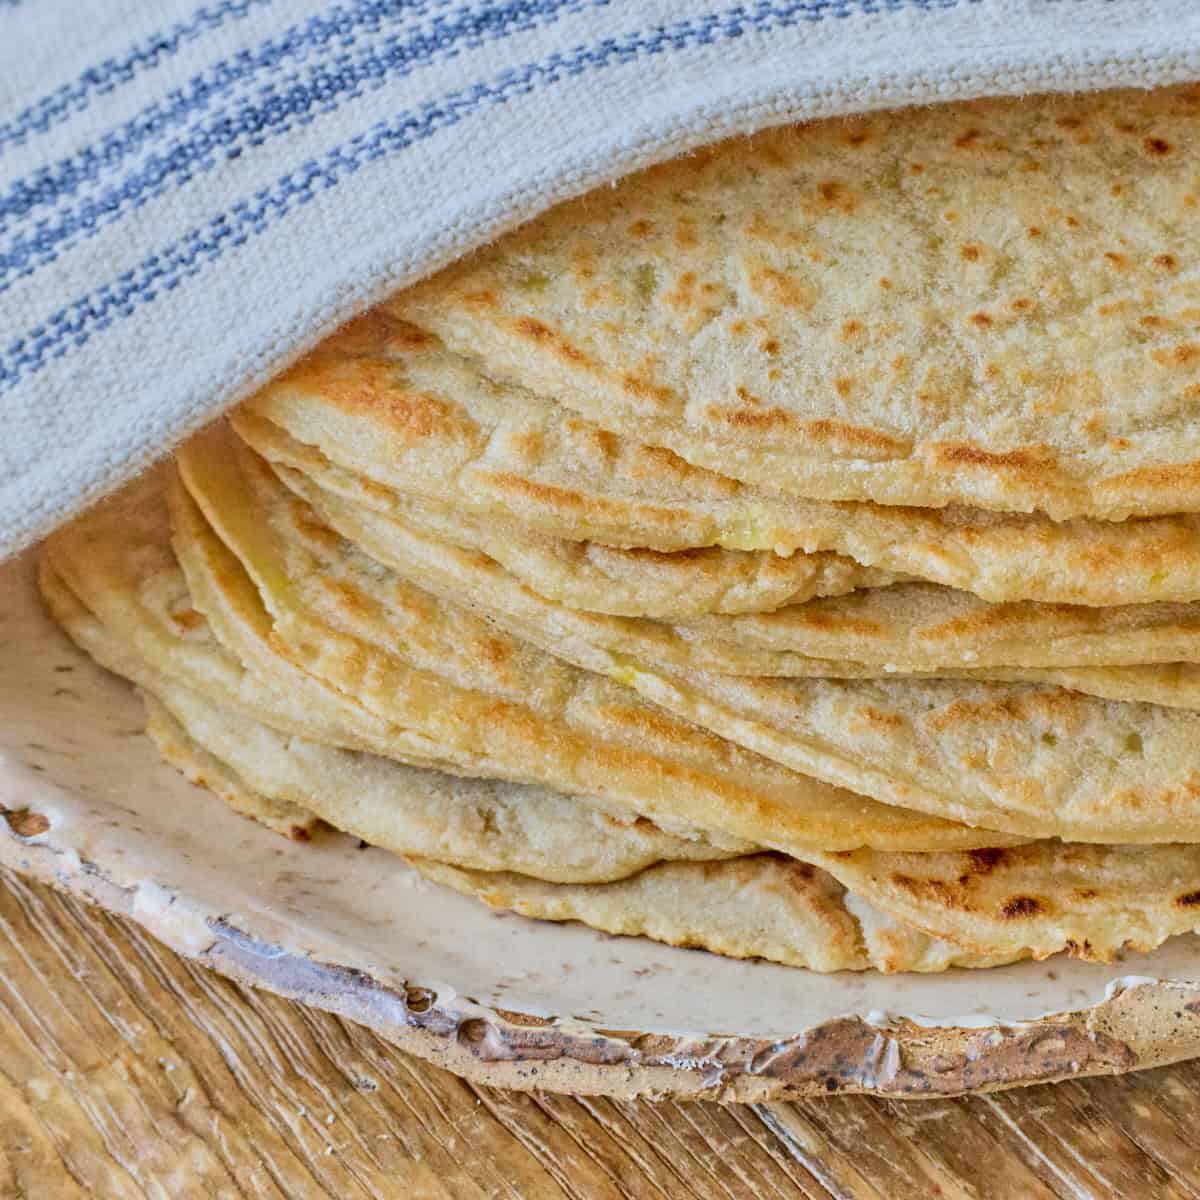
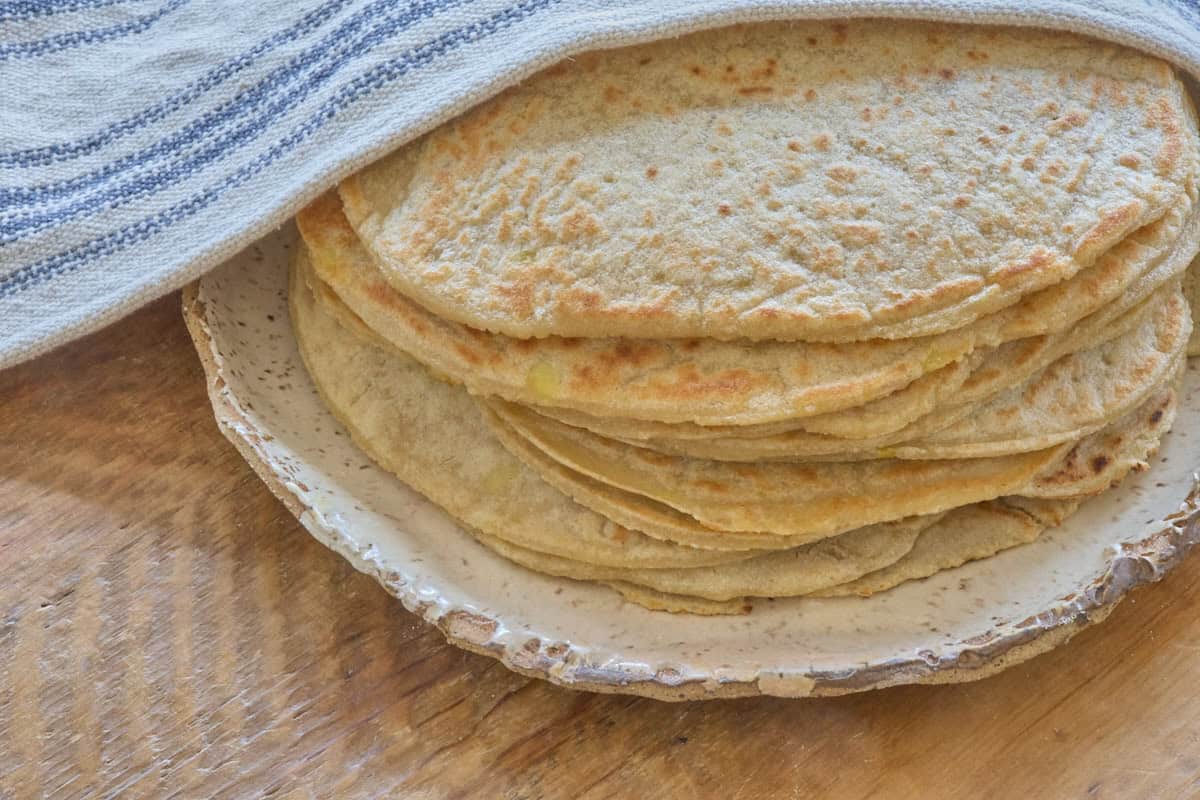
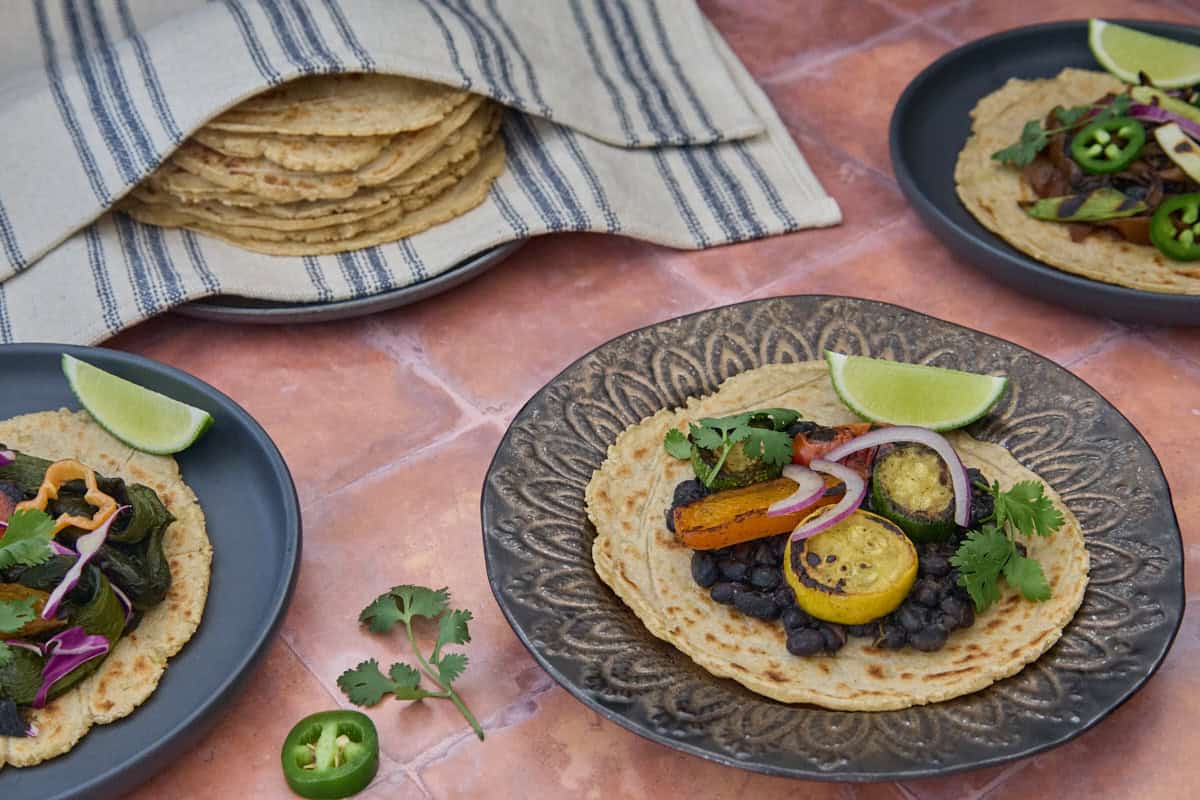
These easy, fluffy potato tortillas are the perfect flavorful and pillowy wrap to hold your favorite fillings. They have a comforting, rustic texture, and are flexible to hold whichever foods you'd like to add. Plus, they're easy to make and are vegan and gluten-free, without compromising on taste!
Jump to:
💕Why this recipe is special
Vegan and gluten-free can be exciting!
I'm new to the gluten-free arena, as I've been hesitating to learn about it for years. It's been too easy to keep making recipes with wheat flour. This is despite awful (adult-onset for me) gluten intolerance pain and bloating issues, every time I eat it. So it's definitely time for me to make the leap and figure out how gluten-free baking works.
Homemade comfort food is the best kind
The most comforting foods for our family seem to be those with some kind of crust, dough, or batter. And it's been really tough trying to decide whether to eat an enticing, fragrant slice of bread and face the inevitable aftermath of pain, or to muster up the dreaded willpower to avoid eating it.
So, although I've been cooking delicious plant-based food for many years, I'm now also embarking on a journey of gluten-free discovery and sharing it with you. And it starts with these easy fluffy potato tortillas.
There's no need to compromise!
I'm thrilled that these tortillas have turned out so well. I love the potatoes as a base. (And they work with sweet potatoes too!) The rustic homemade flavor makes them feel so comfy and satisfying, like a big hug. I think the cassava flour and oat flour work really well together to behave like wheat flour, and to also yield a mild flavor and irresistible texture. And there isn't any pain for me after eating them. I'm really excited to share these tortillas with you.
📓Ingredient notes

- Potatoes: I've used both floury (russet) and waxy (yukon gold) potatoes in this recipe with great success. And sweet potatoes work as well! (See notes in the recipe card for adjustments.) Mashed potatoes play a special role in making these tortillas rich and fluffy. They soften the dough, and lend it a tantalizing homemade taste when baked into these from-scratch flatbreads. They also help make the tortillas pliable, with a smooth chew, and to make your fillings even more enjoyable to eat.
- Cassava flour: This gluten-free flour is derived from the cassava root. This root has a long culinary history throughout the world. You may be familiar with the starch made from cassava, known as tapioca. Here, we're using the flour, which is made using the entire root. It has a soft, delicate texture and a mild flavor. It isn't a one-to-one replacement for wheat flour, but it plays a wonderful part in a blend of gluten-free flours that together make a great wheat flour substitute.
- Oat flour: What's not to love about oats? They're hearty and filling, delicious, and full of fiber. And oat flour has all of these same qualities, in a fine-textured and soft form to use in baking. This gluten-free flour is a nourishing partner to the cassava flour in making these tortillas.
- Baking powder: This leavening agent helps to make the tortillas puffy and soft. For the best rising power, make sure to use baking powder that is fresh - ideally less than 6 months old.
- Salt: I'm using fine kosher salt here. I love a tortilla with a hint of salt. I've used an amount that works well here to make the tortillas flavorful enough to enjoy on their own. Feel free to adjust the amount in the recipe to suit your tastes.
- Shortening: This helps to make the texture of these tortillas flaky and pliable. And it makes the dough soft and forgiving to roll out. I'm using Spectrum organic shortening. It's a non-hydrogenated shortening, and it has 0 g of trans fat. It also has a neutral flavor. Many recipes call for the shortening to be added when chilled, but I find that in this recipe, room temperature works just as well.
- Water: It's helpful for the water in this recipe to be lukewarm, at around around 100-110°F (or 38-43°C.) This helps to activate the cassava and oat flours and allow them to act cohesively in the recipe. This temperature is also cool enough to not melt the shortening that has been added for flakiness.
📒Step-by-step instructions
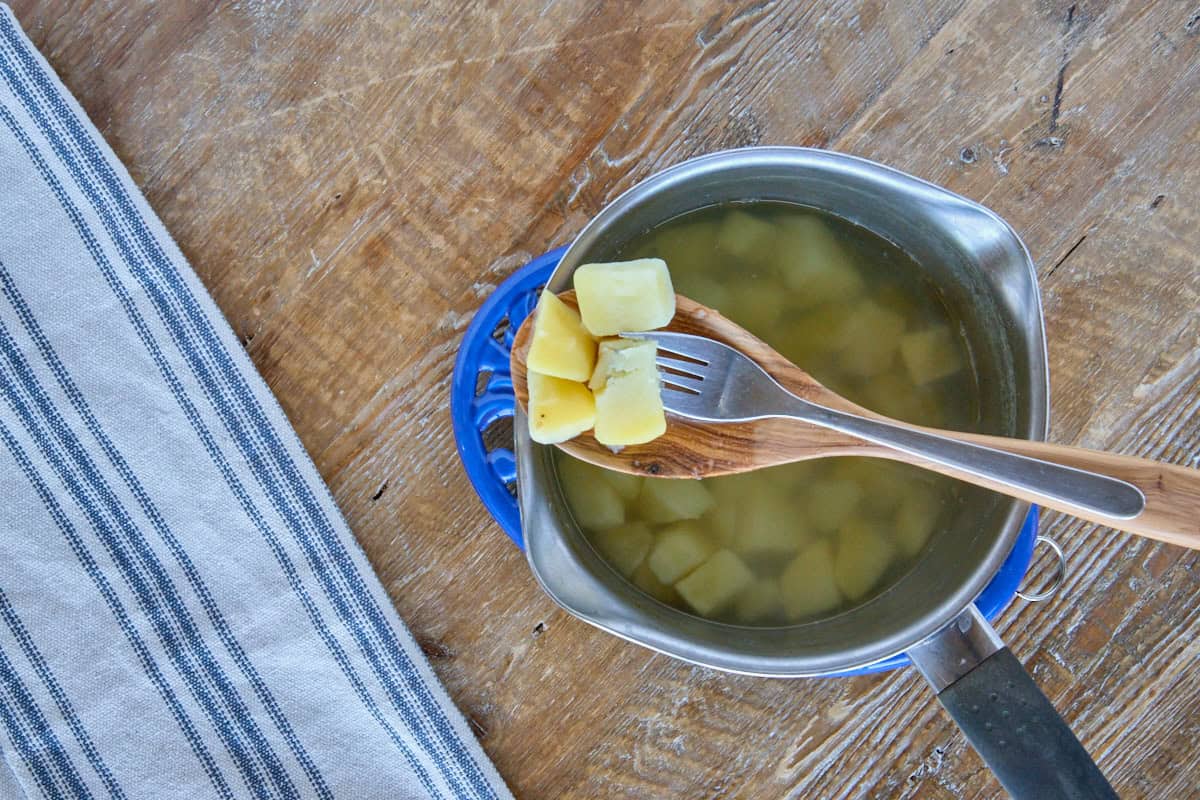
Peel, chop, and boil the potatoes until fork-tender. Drain and allow them to cool slightly.
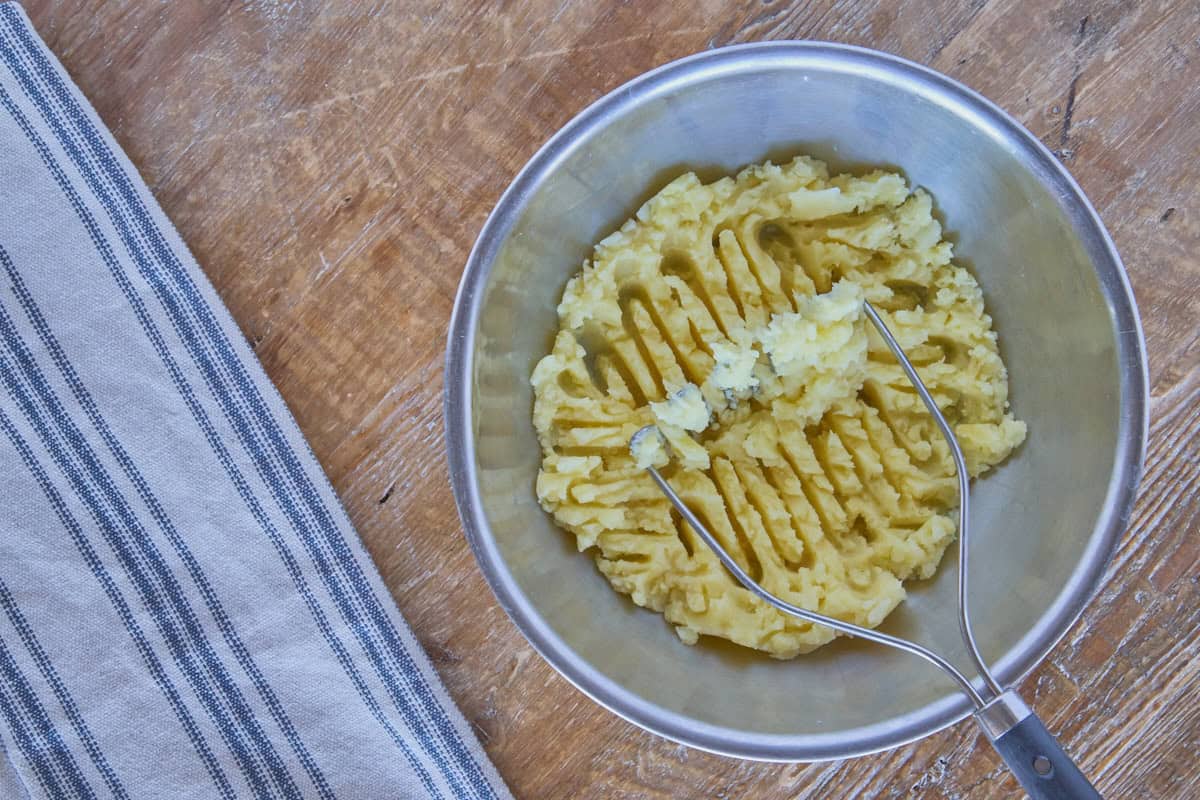
Mash the potatoes with a masher or potato ricer until smooth.
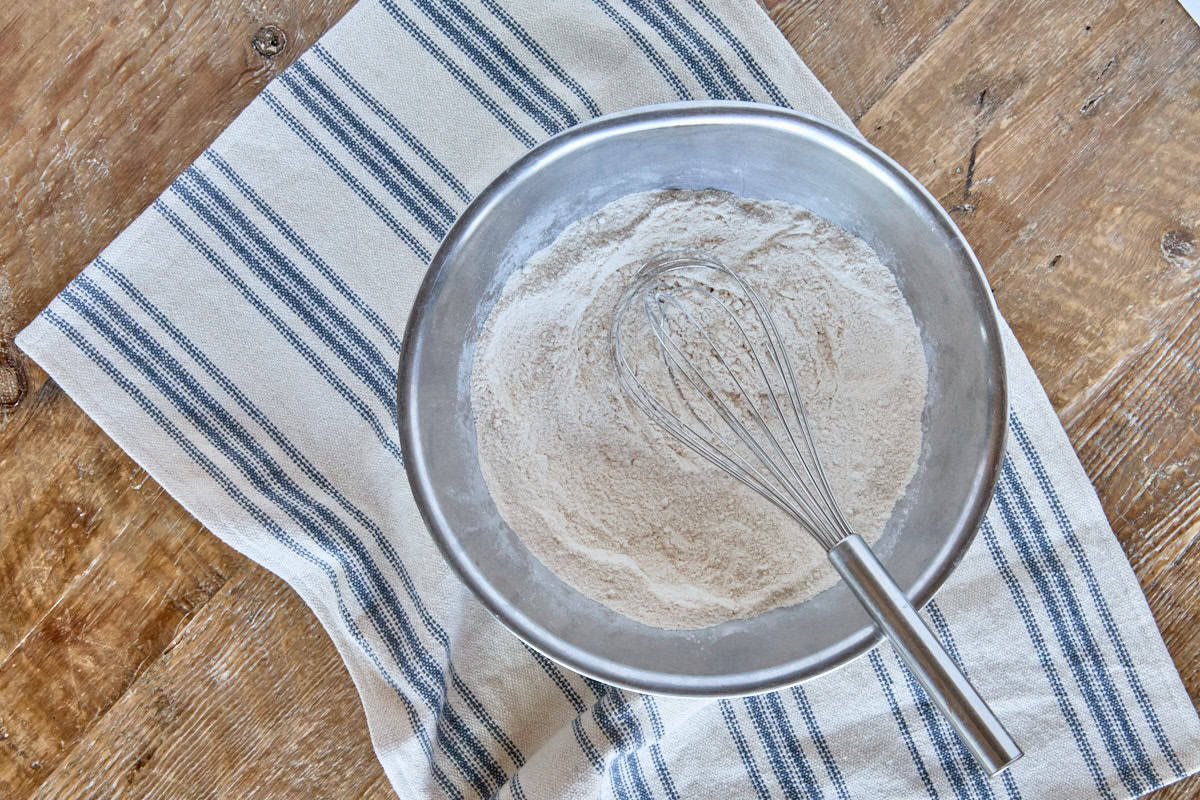
Whisk together the dry ingredients until combined.
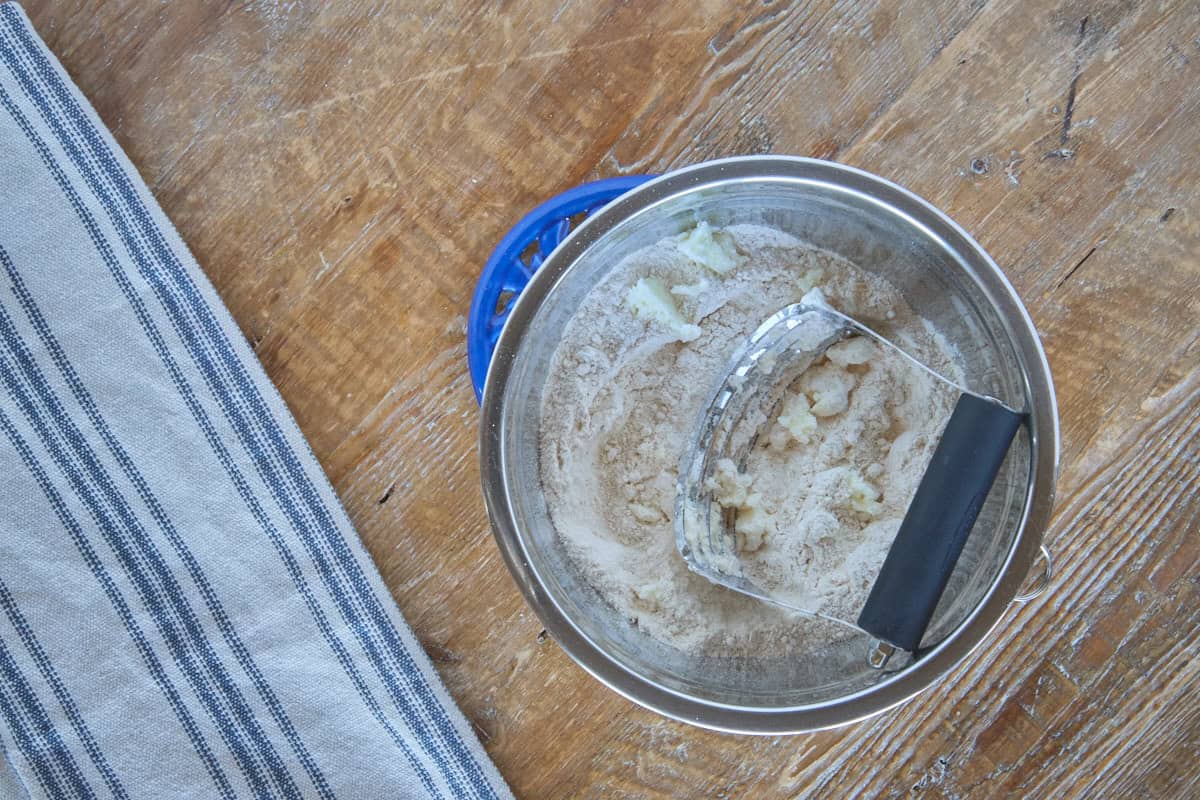
Using a pastry cutter or your fingers, cut the shortening into the dry ingredients until it's the size of large crumbs and well mixed into the dry ingredients.
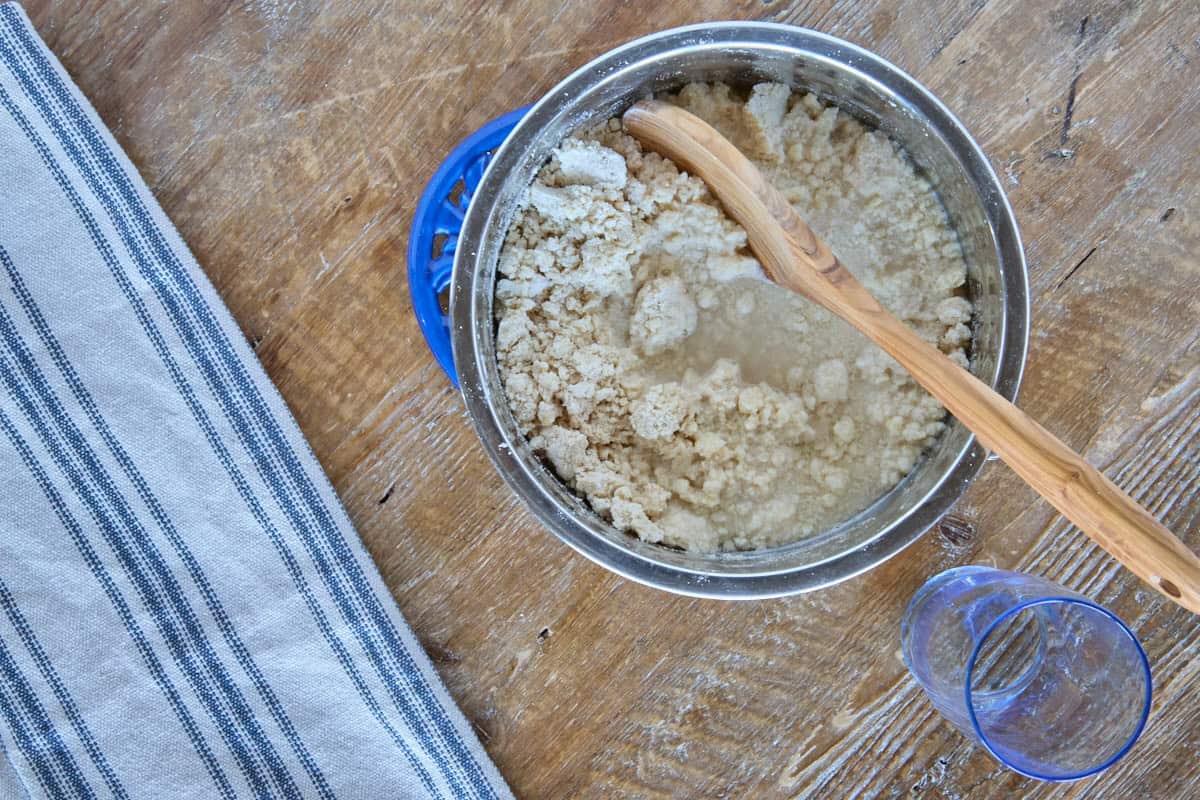
Add the mashed potatoes to the bowl. Stir with a wooden spoon until well-combined into a shaggy mixture. Add the lukewarm water and stir until you have a soft dough. It should be smooth and tacky, but not sticky.
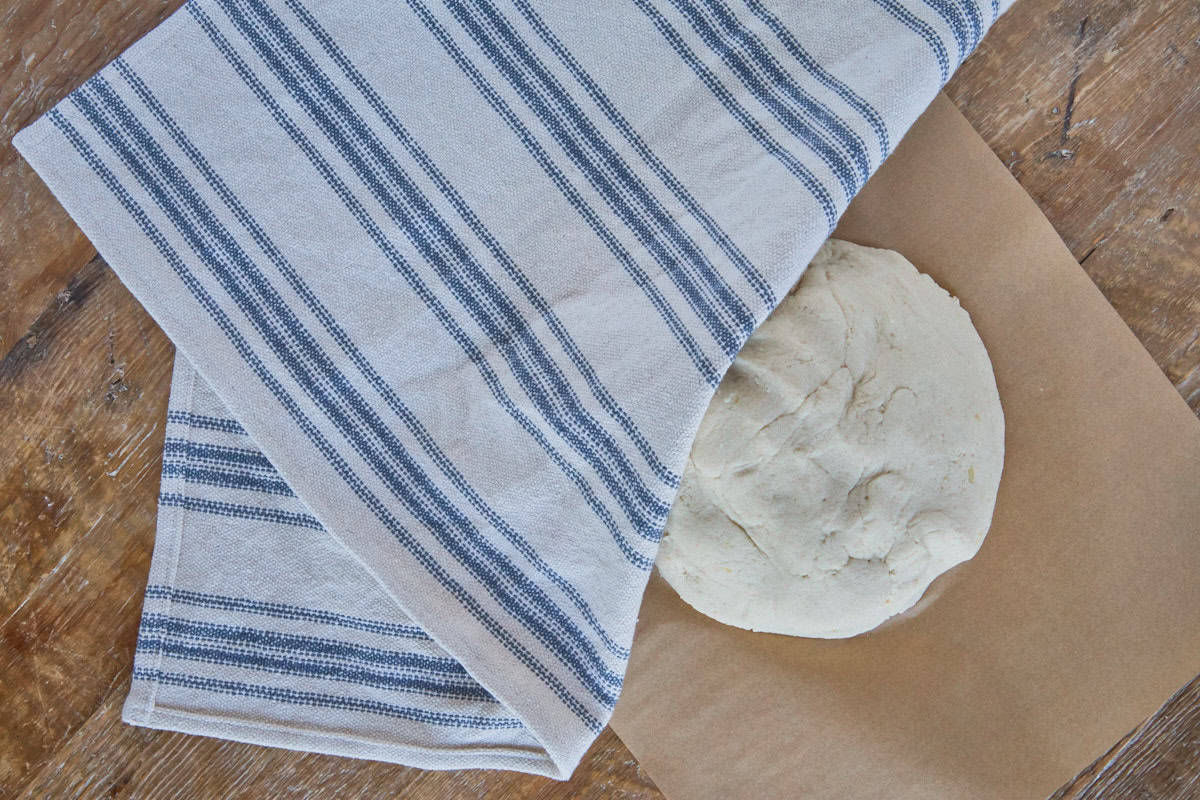
Cover the dough and let it rest for 30 minutes. This is important when using gluten-free flour to allow it to fully hydrate.
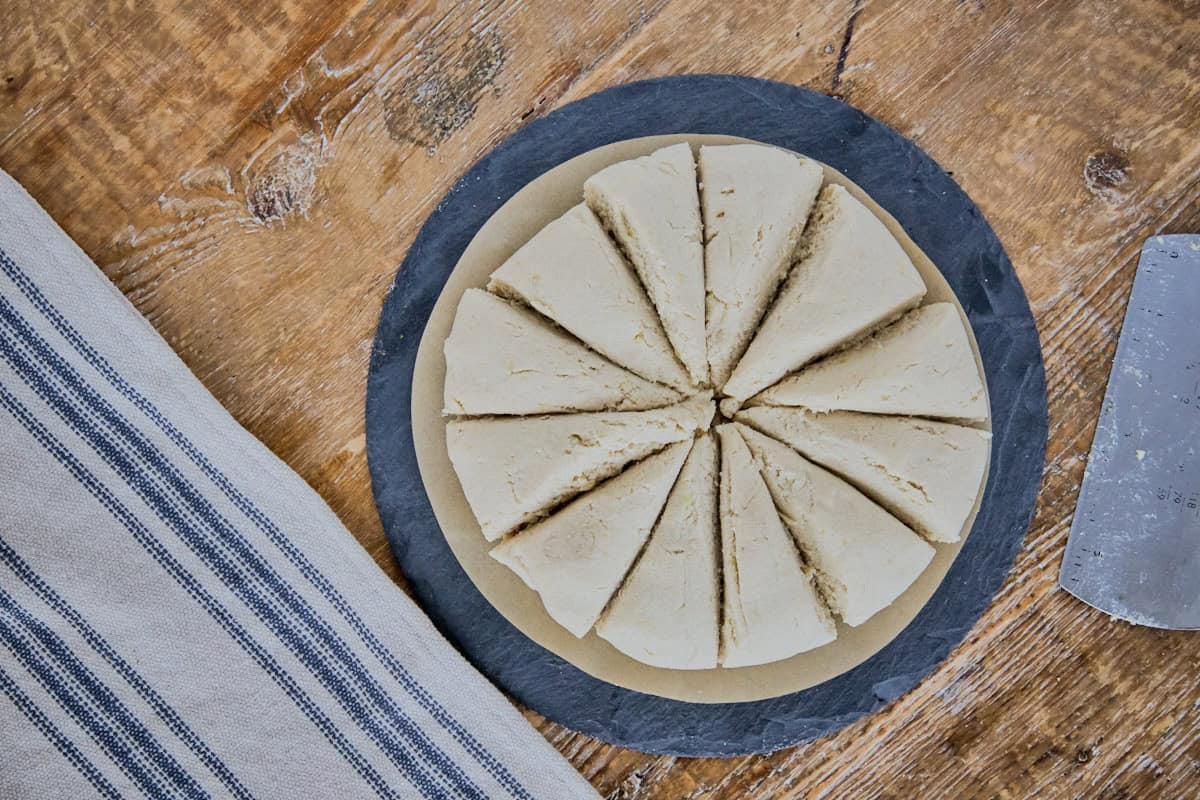
Knead the dough gently for a few minutes until smooth. Divide the dough into 12 equal pieces.

Roll the dough pieces into balls and then roll out each one until 7-8 inches (18-20 cm) in diameter. I like to roll them out between two 9 inch (23 cm) round sheets of parchment paper.

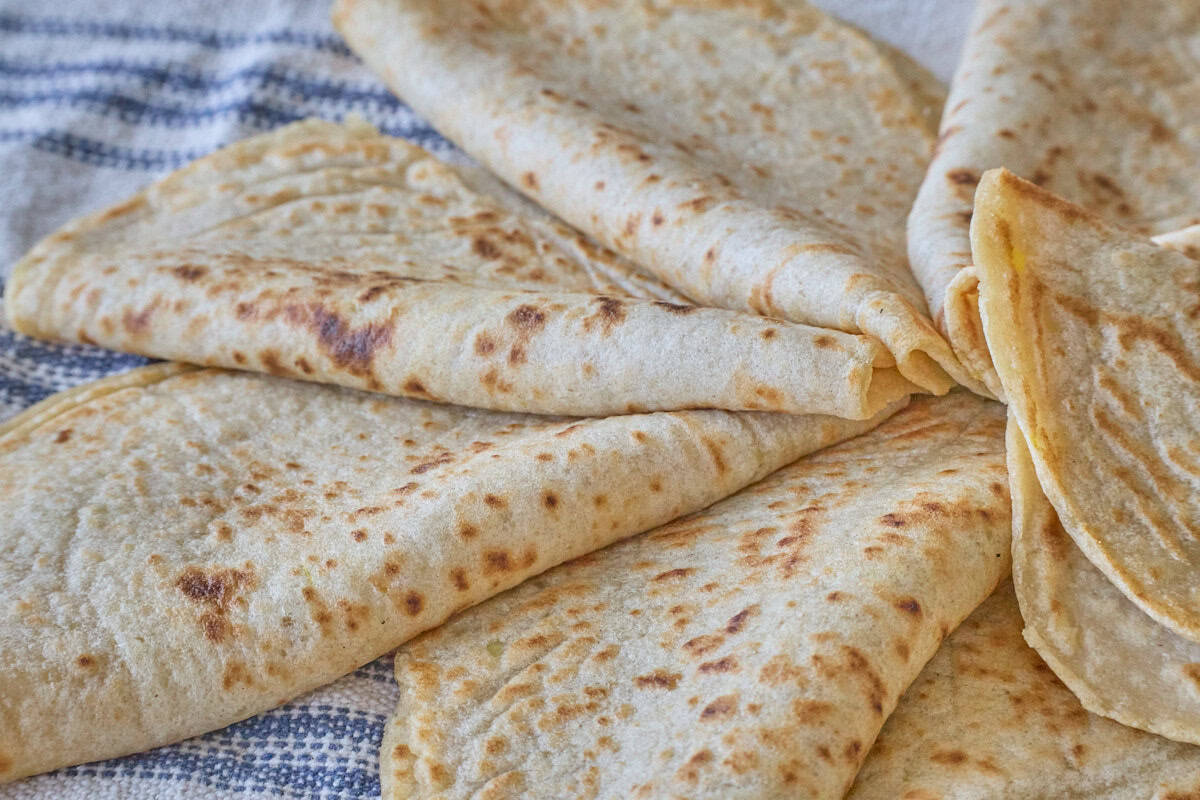
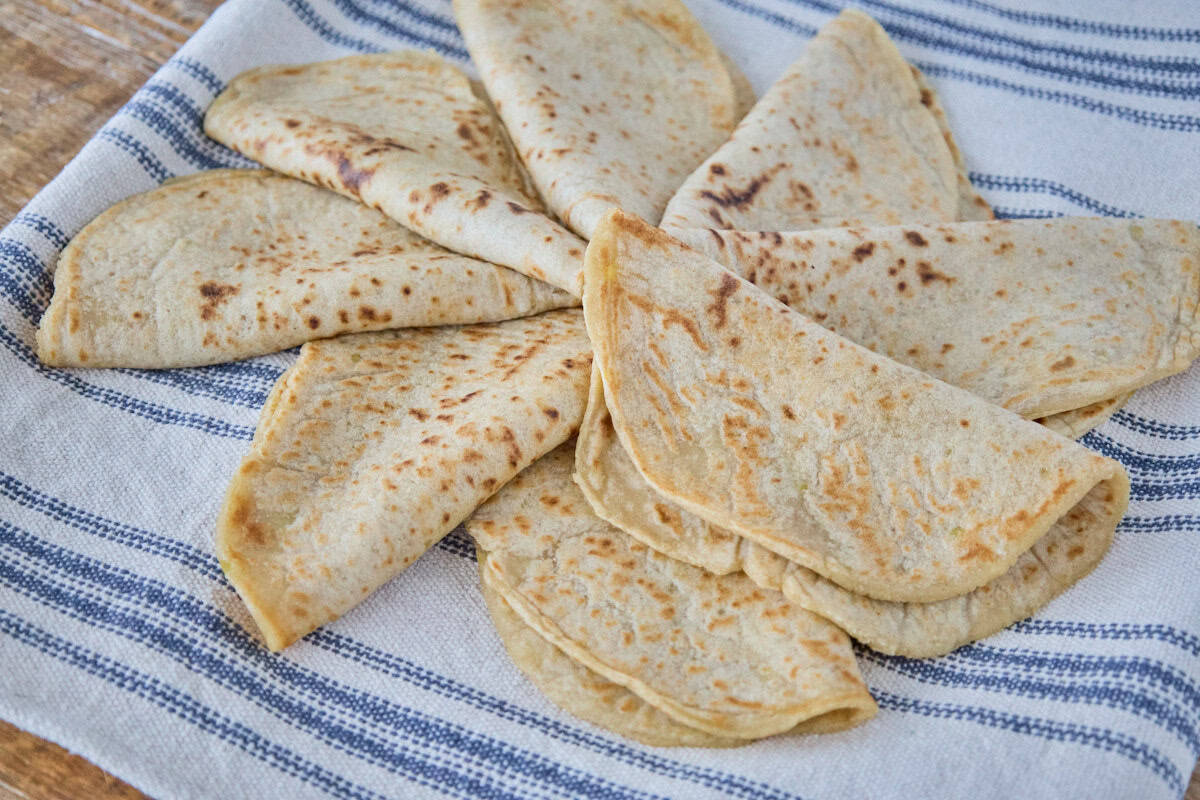
Cook each tortilla at medium-high heat for 1-2 minutes per side. Then flip back to the first side briefly for added puffiness.
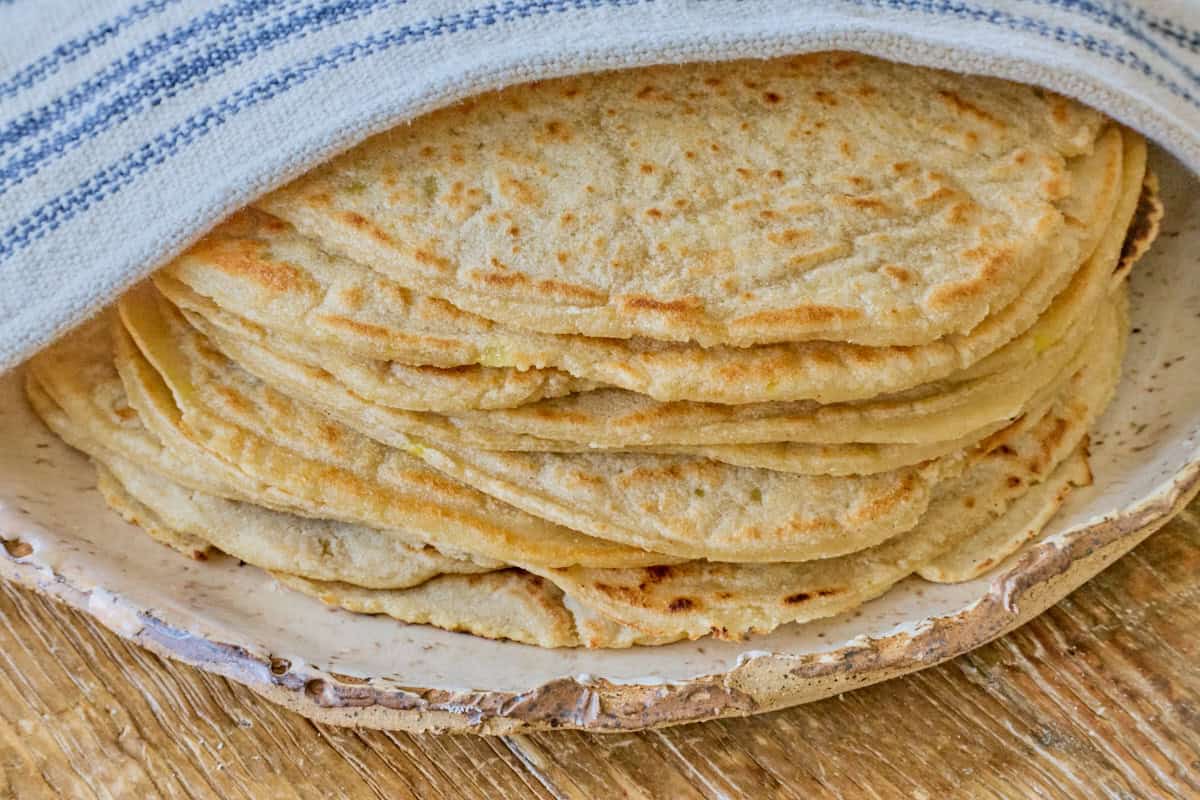
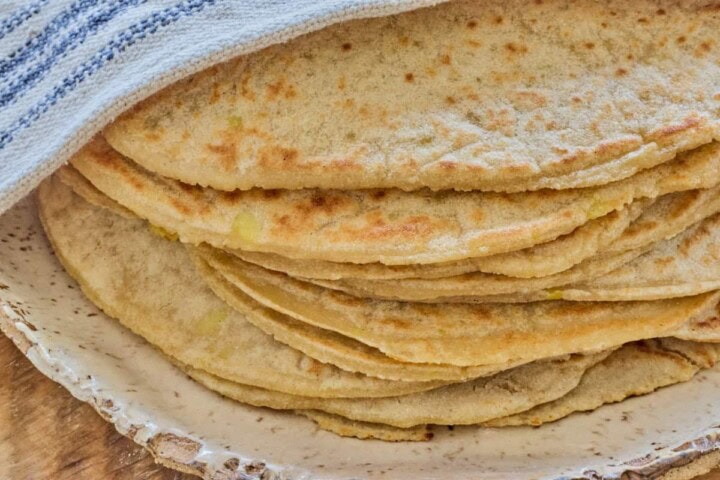
Cover the finished potato tortillas with a kitchen towel to keep them warm until ready to serve.
💡Tips for success
- Weigh Your Ingredients: Please be sure to weigh your ingredients with a digital scale for this recipe. With gluten-free flours, it's especially important to get the correct proportions. And measuring by weight with a scale is more accurate than by volume. Also, a scale is so easy to use, inexpensive, and creates fewer dishes to clean!
- Let the Dough Rest: Make sure let the dough rest to hydrate for 30 minutes. This was a new step for me in learning about gluten-free baking. But it's really important, as gluten-free flours need this time when mixed with the water to activate and come together cohesively. I find that it really improves the texture as well.
- Choose Your Pan: A comal (See the link to a recommendation below in Equipment) is a really great way to cook the tortillas. It's almost completely flat, except for the small lip around the edges. The flatter edge profile makes it really easy to get the tortillas into and out of the pan, and to flip them. But a cast iron or nonstick skillet will work too.
- Optional Cooking with Oil: If you'd like, you can lightly coat your pan with oil when cooking the tortillas. This may make them a bit more crispy around the edges. I find that I don't need this step, and I cook the tortillas in a dry pan.
🍶Variations and substitutions
- Potatoes: I've found that floury potatoes like russets lend a slight earthy hint to the tortillas. And that waxy potatoes such as yukon golds give a mild buttery flavor. I love both variations.
- Sweet potatoes: These will work too! I use the same weight of 630 g as with the regular potatoes (which in volume for me was 2 ½ cups of sweet potatoes compared to 3 cups of regular potatoes), and I roast the sweet potatoes in their skins. When adding water to the dough, I use much less, generally only ½ cup (118 mL). I'd start with this much and use more if needed to create a soft and pliable dough. This may vary depending on the density of your sweet potatoes.
- All-purpose flour: If you're not ready to try gluten-free, you can use all-purpose flour instead of the cassava and oat flour blend. The tortillas will still be vegan. I've found that using all-purpose flour requires less water than in this recipe. Start with ½ cup (118 mL) and mix until your dough is smooth and tacky, but not sticky. You'll still need to rest your dough to relax the gluten, so your tortillas won't be tough.
- Shortening: You can substitute the shortening for olive oil or melted vegan butter in this recipe, in the same quantity. I've chosen the shortening here to add flakiness to the tortillas. Using olive oil or vegan butter will yield a denser texture.
🥣Equipment
- Digital scale: for weighing the ingredients
- Cooking thermometer: for measuring the water temperature
- Pastry cutter: for cutting the shortening into the dough
- Bench scraper: for dividing the dough
- Rolling pin or tortilla press: for shaping the tortillas
- Parchment paper sheets or circles: for an easy way to roll out or pressing the dough
- Pan: a well-seasoned cast iron or nonstick comal (I use the 12-inch one), skillet, or griddle, for cooking the tortillas
- Spatula: for flipping the tortillas
⏲Make ahead and storage
- Make ahead: If you're not ready to serve the tortillas right away, you can make them in advance. And there's flexibility in how you can store them for whenever you need them. Here are three different ways:
- Room temperature storage: After the tortillas have cooled, you can store them in a stack wrapped in paper towels inside a plastic zip bag. They'll keep like this for 2-3 days.
- Fridge storage: Place them in an airtight container and refrigerate them for up to a week.
- Freezer storage: Place a sheet of parchment paper between each cooled tortilla in a stack. Wrap the stack in plastic wrap or aluminum foil, and place in the freezer. They should keep for up to 3 months.
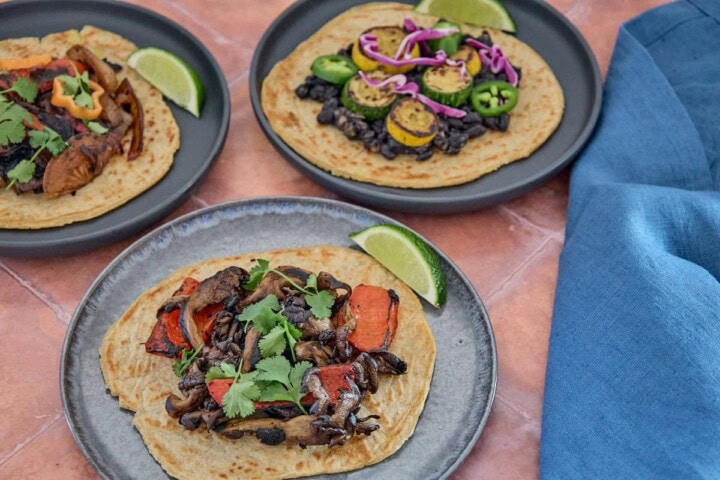
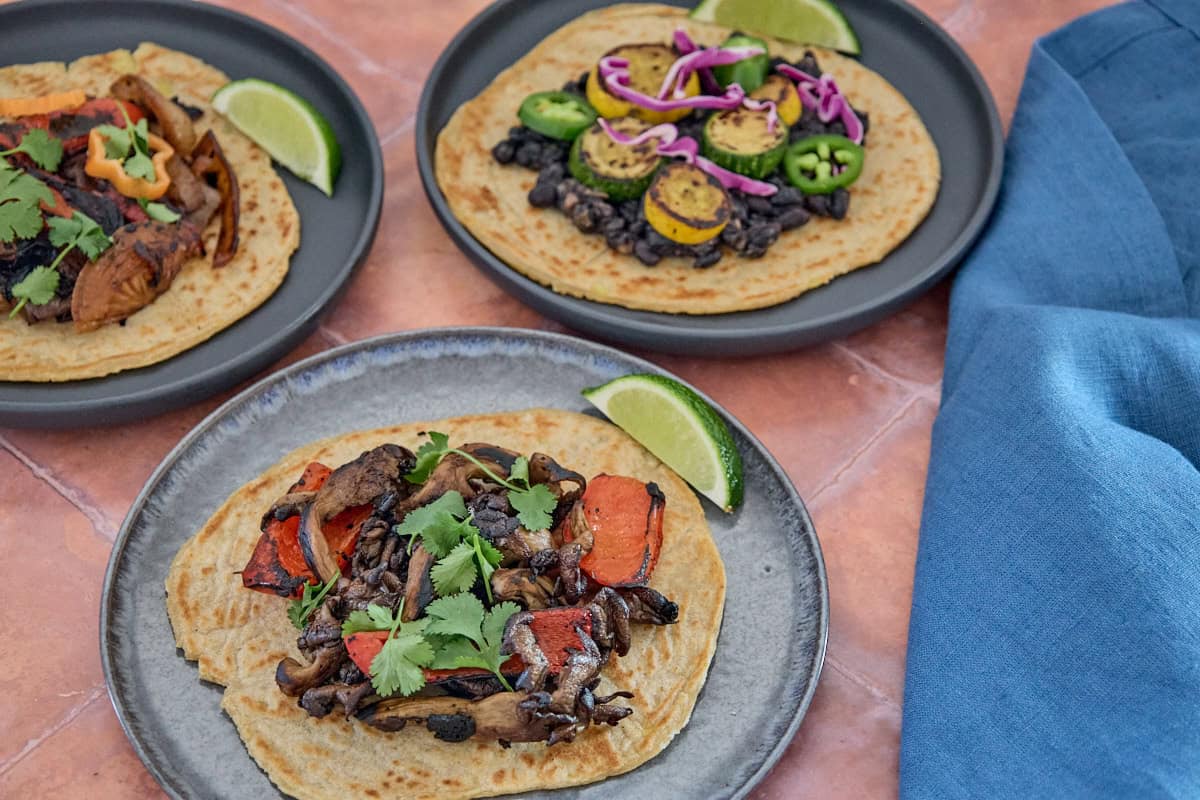
🍲Serving suggestions
- Sandwich wraps: such as these fresh and tangy kale, sweet potato, and fonio wraps with mango yassa sauce.
- Tacos, enchiladas, or burritos: or similarly flavorful ways to incorporate your favorite fillings and sauces.
- Soup or sauce dipper: Use as a hearty accompaniment for dipping.

❓Frequently asked questions
After removing them from the fridge or freezer, you can reheat the tortillas for a few minutes in a skillet for a few minutes on each side on medium heat. Or you can wrap them in a damp paper towel and reheat them in the microwave.
Yes! You can add spices, fresh or dried herbs, or small quantities of finely-chopped veggies. Feel free to experiment with your favorites! Just be careful not to add extra moisture to the dough, as it may affect the texture.
Of course! The dough is soft and forgiving, so either way will work. A tortilla press should save you time, especially if you're making a lot of tortillas at once.
✨More herbs and recipes you'll love
Looking for other garden posts and recipes like this? Try these:

✏️Did you make this recipe?
Please let me know your thoughts in the comments and reviews below!

Easy Fluffy Potato Tortillas (Vegan, Gluten-Free)
Ingredients
- 3 cups (630 g) peeled potatoes, chopped into large chunks (yukon gold or russet, about 2-3 medium)
- 2 cups (262 g) cassava flour
- 1 cup (120 g) oat flour
- 1½ teaspoons baking powder
- 2 teaspoons salt
- 3 tablespoons (38 g) shortening, at room temperature or chilled
- 1½ cups (355 ml) lukewarm water, (100-110°F or 38-43°C)
- cooking oil for pans, optional
Instructions
- Cook the potatoes: Boil the potato chunks they're fork-tender. Drain, and using a potato masher or ricer, mash until smooth. Push the potatoes around with a spatula to make sure any remaining lumps are minimal. Allow them to cool while you prepare the remaining ingredients.
- Mix the dry ingredients: In a medium mixing bowl, whisk together the cassava flour, oat flour, baking powder, and salt.
- Cut in the shortening: Use a pastry cutter or your fingers to combine the shortening into the dry ingredients until the size of large crumbs. This is important to create flaky layers.
- Add the potatoes: Add the mashed potatoes to the ingredients in the bowl. Stir and push the potatoes into the flour with a sturdy wooden spoon until well-combined into a shaggy mixture.
- Add the water: Gradually stir in the lukewarm water until the dough is soft and pliable. It should be slightly tacky but not sticky. Adjust with a little extra cassava flour if needed.
- Allow the dough to hydrate: Let the dough rest for 30 minutes to hydrate and relax, allowing the flours to fully incorporate the water. This is a good time to prepare your fillings!
- Knead the Dough: Gently knead the dough for a few minutes until smooth. It should be soft and easy to work with.
- Separate the dough: Using a bench scraper or knife, divide the dough into 12 equal portions. Shape each into a ball. Cover the finished balls with a kitchen towel while you roll out the current one.
- Shape the tortillas: Place a ball of dough between two sheets of parchment paper or plastic wrap. Roll out into a circle about 7-8 inches (18-20 cm) in diameter. The size can vary based on your preference for thickness. Repeat with the remaining balls of dough. The dough is really forgiving, and you can easily push back any thin edges or patch uneven areas that may arise.
- Cook the Tortillas: Heat a cast iron or non-stick comal or skillet over medium to medium-high heat, depending on the power of your cooktop. You can coat the pan with a little cooking oil if you'd like, but this is optional. Peel back the top parchment paper circle. Flip over the tortilla into your hand, so the tortilla is on the bottom with the sheet of parchment paper on the top. Set the tortilla onto the heated pan. Gently peel off the paper from the top. It should release easily. Cook for about 1-2 minutes on each side, flipping with a spatula when golden brown spots appear on the bottom. For extra fluffiness, flip back to the first side briefly to puff up the tortilla. If the puffing doesn't happen, this is totally okay!
- Keep the tortillas warm and serve: Place the cooked tortillas in a folded kitchen towel to keep warm as you cook the rest. Then serve immediately. Or cool until at room temperature, and then refrigerate, wrapping the stack in paper towels and sealing inside a plastic bag until ready to reheat and use.
Notes
- Digital scale: I encourage you to use one of these to measure the ingredients in this recipe. These scales are inexpensive, easy to use, and much more accurate than measuring by volume. And they reduce the number of dishes you'll need to do when cooking! I've included the ingredient measurements in this recipe in both volume and weight (where it applies), so you can use a scale if you'd like.
- Sweet potatoes: These will work too! I use the same weight of 630 g as with the regular potatoes (although the volume of sweet potatoes for me was 2 ½ cups, compared to 3 cups for regular potatoes.) And I roast the sweet potatoes in their skins. When adding water to the dough, I use much less, generally only ½ cup (118 mL). This may vary depending on the density of your sweet potatoes.
- All-Purpose Flour: If you're not ready to try gluten-free, you can use all-purpose flour instead of the cassava and oat flour blend. The tortillas will still be vegan. I've found that using all-purpose flour requires using less water than in this recipe. Start with ½ cup (118 mL) and mix until your dough is smooth and tacky, but not sticky. You'll still need to rest your dough to rest the gluten, so your tortillas won't be tough.

Leave a Reply